Jessie Doll Amigurumi (Toy Story)
Original design by @张小妖
A crocheted Jessie doll inspired by the cowgirl character from Toy Story, worked in amigurumi style as a soft collectible figure. It makes a fun handmade gift for fans and a cheerful shelf or playroom display.
- Difficulty
- Intermediate
- Hook
- 2.2mm
Materials
- Worsted / sport cotton yarn in multiple colorsAmazon ↗
- 2.2 mm crochet hookAmazon ↗
- 8 mm safety eyesAmazon ↗
- Fiberfill stuffingAmazon ↗
- Stitch markerAmazon ↗
- Tapestry needleAmazon ↗
As an Amazon Associate, Hooklore earns from qualifying purchases. Links open Amazon — a matching product or search results.
Jessie Amigurumi Doll — Cover
Notes
Cover page only. Designed by Burcu Bülbül (sihirli__halka). Toy Story Jessie-style amigurumi doll. No pattern instructions on this page.
Jessie Amigurumi Doll — Copyright & Contact
Notes
Copyright / contact page only. No pattern instructions.
Jessie Amigurumi Doll — Terms & Materials

ABBREVIATIONS:
ch = chain
sc = single crochet
inc = increase
dec = decrease
hdc = half double crochet
dc = double crochet
W = 3 sc into the same stitch
3tog = crochet 3 stitches together
sl st = slip stitch
(...)*N = repeat the instructions in parentheses N times
FLO = front loop only
BLO = back loop only
Notes
Yarn: worsted/sport cotton (e.g. Catania-weight). Colors used: Skin (Head, Arms, Body, Ears); Ecru (Legs, Body, Arms, Hat); Black (Legs); Blue (Body, Legs); Yellow (Body); Brown (Legs, Belt); Red (Hat); Light Orange (Hair). Hook: 2.20 mm. Also needed: 8 mm safety eyes, colored pencil (for cheek blush), fiberfill, stitch marker, tapestry needle, scissors. (Brand names dropped per house style.)
Jessie Amigurumi Doll — Head

Head (stuff firmly as you go)
Rnd 1: 6 sc in MR (6)
Rnd 2: inc in each st around (12)
Rnd 3: *sc, inc*, rep around (18)
Rnd 4: *2 sc, inc*, rep around (24)
Rnd 5: *3 sc, inc*, rep around (30)
Rnd 6: 2 sc, inc, *4 sc, inc* x5, 2 sc (36)
Rnd 7: *5 sc, inc*, rep around (42)
Rnds 8-15: sc in each st around (42)
Rnd 16: 14 sc, *4 inc, 6 sc* x2, 8 sc (50)
Rnds 17-19: sc in each st around (50)
Insert the safety eyes between Rnds 15 and 16, leaving 4 sc between them; place them on the increase sts of Rnd 16.
Rnd 20: *3 sc, dec* x10 (40)
Rnd 21: *8 sc, dec* x4 (36)
Rnd 22: *4 sc, dec* x6 (30)
Rnd 23: *3 sc, dec* x6 (24)
Rnd 24: *2 sc, dec* x6 (18)
Rnds 25-31: sc in each st around (18)
Fasten off. Push the tube crocheted from Rnd 25 down into the head to form the neck, as shown in the photos.
Notes
Skin color. 8 mm safety eyes set between Rnds 15-16 on the Rnd 16 increases. Add cheek blush with colored pencil. The Rnd 25-31 tube becomes the neck.
Jessie Amigurumi Doll — Hair & Fringe

Hair
Rnd 1: 6 sc in MR (6)
Rnd 2: inc in each st around (12)
Rnd 3: *sc, inc*, rep around (18)
Rnd 4: *2 sc, inc*, rep around (24)
Rnd 5: *3 sc, inc*, rep around (30)
Rnd 6: 2 sc, inc, *4 sc, inc* x5, 2 sc (36)
Rnd 7: *5 sc, inc*, rep around (42)
Rnds 8-9: sc in each st around (42)
Rnd 10: *6 sc, inc*, rep around (48)
Rnds 11-14: sc in each st around (48)
Hair strands: *ch 25, starting from the 2nd ch: 24 sc back down the chain, 1 sl st into the 14th row of the cap* x3. Fasten off.
Sew or glue the wig onto the head. Braid the hair strands into a braid.

Fringe (do not stuff, make 2)
Rnd 1: 7 sc in MR (7)
Rnd 2: inc in each st around (14)
Rnds 3-4: sc in each st around (14)
Rnd 5: *5 sc, dec* x2 (12)
Rnds 6-7: sc in each st around (12)
Rnd 8: *4 sc, dec* x2 (10)
Rnd 9: sc in each st around (10)
Rnd 10: *3 sc, dec* x2 (8)
Rnds 11-13: sc in each st around (8)
Rnd 14: 4 dec, 1 sl st (4). Fasten off. Sew or glue onto the head.
Notes
Light orange / ginger color for hair. The 3 long chain strands are braided into Jessie's signature braid.
Jessie Amigurumi Doll — Ears & Hat

Ears
MR, 6 sc, 1 sl st (6). Leave a long tail for sewing.

Hat
Rnd 1: 6 sc in MR (6)
Rnd 2: inc in each st around (12)
Rnd 3: *sc, inc*, rep around (18)
Rnd 4: *2 sc, inc*, rep around (24)
Rnd 5: *3 sc, inc*, rep around (30)
Rnd 6: 2 sc, inc, *4 sc, inc* x5, 2 sc (36)
Rnd 7: *5 sc, inc*, rep around (42)
Rnd 8: 3 sc, inc, *6 sc, inc* x5, 3 sc (48)
Rnd 9: sc in BLO of each st around (48)
Rnds 10-11: sc in each st around (48)
Rnd 12: sc in FLO of each st around (48)
Rnd 13: *7 sc, inc*, rep around (54)
Rnd 14: 4 sc, inc, *8 sc, inc* x5, 4 sc (60)
Rnd 15: *9 sc, inc*, rep around (66)
Rnd 16: 5 sc, inc, *10 sc, inc* x5, 5 sc (72)
Rnd 17: *11 sc, inc*, rep around (78)
Rnd 18: 78 sl st around. Fasten off.
Embroider the hat as shown in the photo.
Notes
Ears in skin color. Hat in red with white embroidered detail along the brim. The BLO round (Rnd 9) and FLO round (Rnd 12) create the fold for the hat brim.
Jessie Amigurumi Doll — Body

Body (stuff as you go)
Rnd 1: 6 sc in MR (6)
Rnd 2: inc in each st around (12)
Rnd 3: *sc, inc*, rep around (18)
Rnd 4: *2 sc, inc*, rep around (24)
Rnd 5: *3 sc, inc*, rep around (30)
Rnd 6: *4 sc, inc*, rep around (36)
Rnd 7: sc in each st around (36)
Change to ecru.
Rnd 8: 36 sl st in BLO around (36)
Rnd 9: 36 sc in BLO around (36)
Rnds 10-12: sc in each st around (36)
Rnd 13: *4 sc, dec* x6 (30)
Change to yellow.
Rnd 14: sc in each st around (30)
Rnd 15: *3 sc, dec* x6 (24)
Rnd 16: sc in each st around (24)
Rnd 17: *2 sc, dec* x6 (18)
Change to skin.
Rnd 18: 18 sc in BLO around (18)
Rnd 19: *sc, dec* x6 (12)
Rnds 20-26: sc in each st around (12)
Fasten off and cinch the remaining sts closed with a tapestry needle.
Collar trim: working into the front loops left from Rnd 18, *ch 2, sc* x18 around. Fasten off.
Notes
Color sequence bottom to top: blue (Rnds 1-7), ecru/white shirt (Rnds 8-12), yellow stripe (Rnds 14-16), then skin for the neck. The (ch 2, sc) x18 round adds a small ruffled collar at the neckline.
Jessie Amigurumi Doll — Joining Head & Body (Assembly)

Assembly
Working into Rnd 8 as shown in the photo: 36 sc around. Fasten off.
Attach the head to the body: take the needle in through one side of the neck and out the other side, then bring it out through the top of the head. Repeat this 3 times, then knot a few times on top of the head and secure.
Notes
Assembly / joining page, mostly step photos. Sew the head firmly onto the neck tube before adding hair.
Jessie Amigurumi Doll — Legs / Boots

Legs (stuff as you go; make 2)
Rnd 1: ch 5, starting from the 2nd ch: inc, 2 sc, W (3 sc in one st) at the tip, 3 sc, then continue around the other side (10)
Rnd 2: *2 inc, 3 sc* x2 (14)
Rnd 3: sc in BLO of each st around (14)
Rnd 4: sc in each st around (14)
Rnd 5: 6 sc, *dec, sc* x2, 2 sc (12)
Rnd 6: 4 sc, 4 dec (8)
Change to ecru.
Rnd 7: sc in each st around (8)
Rnd 8: *3 sc, inc* x2 (10)
Change to blue.
Rnd 9: *4 sc, inc* x2 in BLO (12)
Rnd 10: 2 sc, dec, 4 sc, dec, 2 sc (10)
Rnd 11: 2 sc, 1 sl st. Leave a long tail for sewing.
Boot cuff trim: working into Rnd 9 as shown in the photo —
Rnd 1: 10 sc, 1 sl st, ch 1
Rnd 2: 2 sc, inc, 4 sc, inc, 2 sc (12), 1 sl st, ch 1
Rnd 3: 12 sc, 1 sl st. Fasten off.
Embroider the boots as shown in the photo.
Notes
Brown boot toe, ecru/white sole accent, blue jeans/cuff. Make 2. The W stitch (3 sc in one stitch) shapes the toe of the oval-soled boot.
Jessie Amigurumi Doll — Arms

Arms (do not stuff, make 2)
Rnd 1: 8 sc in MR (8)
Rnd 2: sc in each st around (8)
Rnd 3: *2 sc, dec* x2 (6)
Change to ecru.
Rnd 4: 6 sl st in BLO around (6)
Rnd 5: 6 sc in BLO around (6)
Rnds 6-10: sc in each st around (6), 1 sl st. Leave a long tail for sewing.
Embroider the belt as shown in the photo. The doll (Jessie) is now finished.
Notes
Skin then ecru/white sleeve. Make 2. Finishing: embroider the brown belt across the body; assemble all parts. Done.
Frequently asked questions
What kind of yarn works best for an amigurumi doll like this?
The pattern does not state a yarn. A smooth worsted or DK acrylic is a common choice for character dolls because it holds stitch definition and comes in a wide color range for the outfit and hair.
How do I stop stuffing from showing through the doll?
Use a hook a size or two smaller than your yarn's label recommends. The tighter fabric keeps the stuffing hidden and gives the doll a firm, even shape.
More crochet patterns
Pouty Happy Fish (Walking Fish Meme)
Bikini Bottom Fish Pair (Cool & Lazy Fish)
Marcille Squishy Charm (Delicious in Dungeon)
Grogu Doll
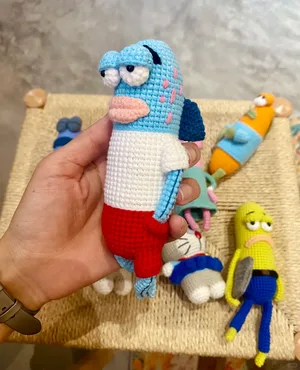
Bikini Bottom Character
