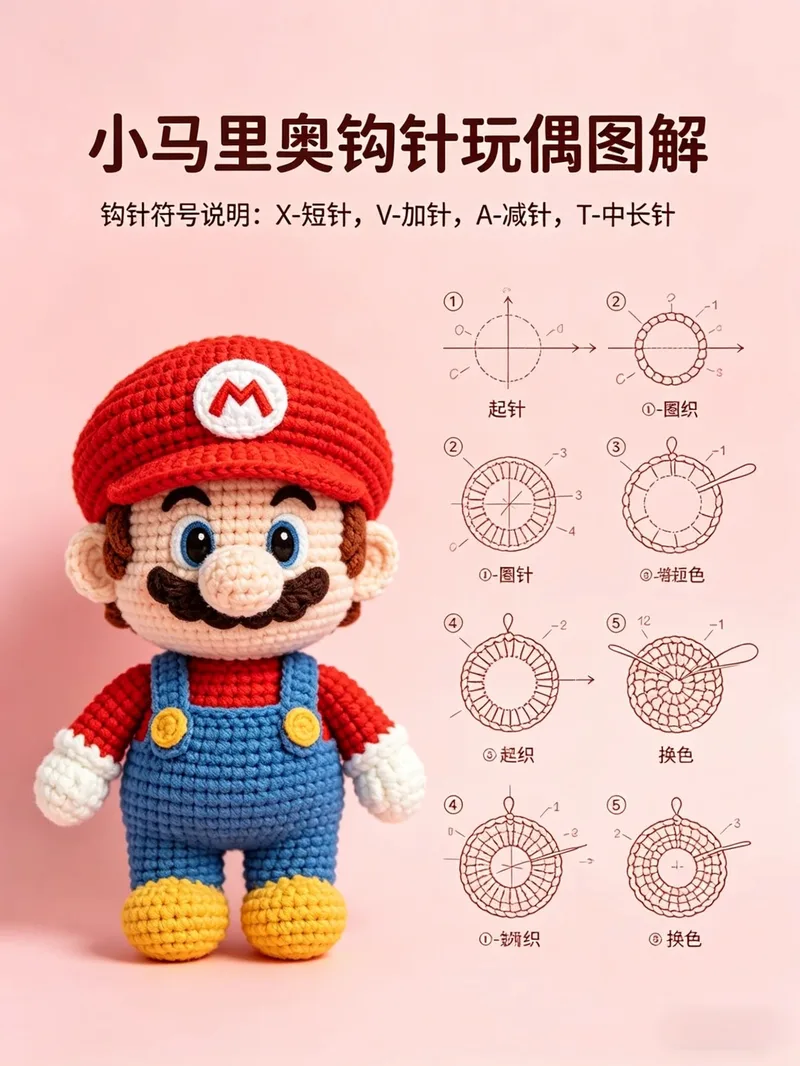
Mini Mario Doll
Original design by @那丫头真拽
A complete mini Mario doll pattern across nine clear pages: head, ears, nose, mustache, gloved arms with thumbs, shoes-to-overalls legs, bib and straps, hair cap with sideburns, and the red M hat.
- Difficulty
- Intermediate
- Time
- 8-12 hours
Materials
- Yarn in skin tone, white, light coffee, dark blue, red, pale yellow and light brownAmazon ↗
- FiberfillAmazon ↗
- White felt or yarn for the M badgeAmazon ↗
As an Amazon Associate, Hooklore earns from qualifying purchases. Links open Amazon — a matching product or search results.
Stitches used: MR, sc, inc, dec, dc, sl st, ch, BLO, FLO
Mini Mario Doll — Head, Part 1 (Page 3 of 9)

Materials: yarn in skin tone, white, light coffee, dark blue, red, pale yellow, light brown.
Symbols: x = sc, v = inc, a = dec, ch = chain, sl = sl st, f = dc, BLO = back loop only, FLO = front loop only.

Head (skin tone)
Rnd 1: 6 sc in MR (6)
Rnd 2: Inc in each st around (12)
Rnd 3: *Sc, inc* ×6 (18)
Rnd 4: *2 sc, inc* ×6 (24)
Rnd 5: *3 sc, inc* ×6 (30)
Rnd 6: *4 sc, inc* ×6 (36)
Rnd 7: *5 sc, inc* ×6 (42)
Head continues on the next page.
Notes
Page 3 of 9 of the Mini Mario doll pattern (完整清晰版 by 那丫头真拽). Symbols defined on page 3: x=sc, v=inc, a=dec, ch=chain, sl=sl st, f=dc, BLO=back loop, FLO=front loop; g appears in the arm row as a special st (thumb bump). Colors: skin, white, light coffee, dark blue, red, pale yellow, light brown.
Mini Mario Doll — Head End, Ears & Nose (Page 4 of 9)

Head (continued)
Rnd 8: *6 sc, inc* ×6 (48)
Rnds 9-20: Sc in each st around (48)
Rnd 21: *Sc, dec* ×16 (32)
Rnd 22: *2 sc, dec* ×8 (24). Stuff firmly; finish per assembly.

Ears (make 2, skin tone)
Rnd 1: 6 sc in MR. Fasten off, sew to the sides.

Nose (skin tone)
Rnd 1: 6 sc in MR (6)
Rnd 2: *Sc, inc* ×3 (9)
Rnd 3: Sc around (9). Stuff lightly, sew to the face center.

Mustache (light coffee) — continues on the next page.
Notes
Page 4 of 9 of the Mini Mario doll pattern (完整清晰版 by 那丫头真拽). Symbols defined on page 3: x=sc, v=inc, a=dec, ch=chain, sl=sl st, f=dc, BLO=back loop, FLO=front loop; g appears in the arm row as a special st (thumb bump). Colors: skin, white, light coffee, dark blue, red, pale yellow, light brown.
Mini Mario Doll — Mustache & Arms (Page 5 of 9)

Mustache (light coffee)
Row 1: Ch 10; starting from the 2nd ch from hook: *sc, (3 dc in one st)* ×4, sc. Shape into the wavy mustache and sew under the nose.

Arms (make 2, start in white)
Rnd 1: 6 sc in MR (6)
Rnd 2: *Sc, inc* ×3 (9)
Rnd 3: Sc around (9)
Rnd 4: Left arm: 4 sc, thumb bump (g), 4 sc | Right arm: sc, thumb bump, 7 sc
Rnds 5-6: Sc around (9)
Rnd 7: BLO sc around (9); change to red
Rnds 8-12: Sc around (9)
Fasten off, fold flat and close with 4 sl st; work a round of sc into the remaining front loops of Rnd 7 for the glove cuff.
Notes
Page 5 of 9 of the Mini Mario doll pattern (完整清晰版 by 那丫头真拽). Symbols defined on page 3: x=sc, v=inc, a=dec, ch=chain, sl=sl st, f=dc, BLO=back loop, FLO=front loop; g appears in the arm row as a special st (thumb bump). Colors: skin, white, light coffee, dark blue, red, pale yellow, light brown. 'g' is the chart's symbol for the small thumb bump (work a bobble/popcorn-style bump in one st).
Mini Mario Doll — Legs & Joining (Page 6 of 9)

Legs (make 2, start light coffee = shoes)
Rnd 1: 6 sc in MR (6)
Rnd 2: Inc around (12)
Rnd 3: Sc around (12); change to dark blue
Rnd 4: BLO sc around (12)
Rnds 5-6: Sc around (12)

Join the two legs:
Rnd 7: *3 sc, inc* ×6 across both legs (36)
Rnd 8: *4 sc, inc* ×6 — as printed; body count settles at 36
Rnds 9-14: Sc around (36); change to red
Rnd 15: BLO sc around (36)
Body continues on the next page.
Notes
Page 6 of 9 of the Mini Mario doll pattern (完整清晰版 by 那丫头真拽). Symbols defined on page 3: x=sc, v=inc, a=dec, ch=chain, sl=sl st, f=dc, BLO=back loop, FLO=front loop; g appears in the arm row as a special st (thumb bump). Colors: skin, white, light coffee, dark blue, red, pale yellow, light brown.
Mini Mario Doll — Body End & Overalls Bib (Page 7 of 9)

Body (continued, red)
Rnds 16-17: Sc around (36)
Rnd 18: *4 sc, dec* ×6 (30)
Rnd 19: Sc around (30)
Rnd 20: *3 sc, dec* ×6 (24)
Rnd 21: Sc around (24). Stuff; attach the head.

Overalls bib & straps (dark blue)
Set-up: Work 10 sc into the FLO left at pants Rnd 14, centered at the front
Row 1: 10 sc, ch 1, turn
Row 2: 10 sc, ch 1, turn
Row 3: 10 sc
Continue sc along the side edges of the bib. Straps: ch 15; from 2nd ch 14 sc; make two, cross at the back and sew on.
Notes
Page 7 of 9 of the Mini Mario doll pattern (完整清晰版 by 那丫头真拽). Symbols defined on page 3: x=sc, v=inc, a=dec, ch=chain, sl=sl st, f=dc, BLO=back loop, FLO=front loop; g appears in the arm row as a special st (thumb bump). Colors: skin, white, light coffee, dark blue, red, pale yellow, light brown.
Mini Mario Doll — Buttons & Hair, Part 1 (Page 8 of 9)

Overall buttons (pale yellow, make 2)
Rnd 1: 4 sc in MR. Fasten off, sew to the bib straps.

Hair cap (light brown)
Rnd 1: 6 sc in MR (6)
Rnd 2: Inc around (12)
Rnd 3: *Sc, inc* ×6 (18)
Rnd 4: *2 sc, inc* ×6 (24)
Rnd 5: *3 sc, inc* ×6 (30)
Rnd 6: *4 sc, inc* ×6 (36)
Rnd 7: *5 sc, inc* ×6 (42)
Rnd 8: *6 sc, inc* ×6 (48)
Hair continues on the next page.
Notes
Page 8 of 9 of the Mini Mario doll pattern (完整清晰版 by 那丫头真拽). Symbols defined on page 3: x=sc, v=inc, a=dec, ch=chain, sl=sl st, f=dc, BLO=back loop, FLO=front loop; g appears in the arm row as a special st (thumb bump). Colors: skin, white, light coffee, dark blue, red, pale yellow, light brown.
Mini Mario Doll — Hair End & Hat Start (Page 9a)

Hair cap (continued)
Rnds 9-16: Sc around (48)
Rnd 17 (sideburns): Sl st, ch 6 + 5 sc back down the chain from the 2nd ch, 19 sc, sl st, ch 6 + 5 sc back, 27 sc. Sew the hair cap on the head.

Hat (red)
Rnd 1: 6 sc in MR (6)
Rnd 2: Inc around (12)
Rnd 3: *Sc, inc* ×6 (18)
Rnd 4: *2 sc, inc* ×6 (24)
Rnd 5: *3 sc, inc* ×6 (30)
Rnd 6: *4 sc, inc* ×6 (36)
Rnd 7: *5 sc, inc* ×6 (42)
Hat continues on the next page.
Notes
Page 9 of 9 of the Mini Mario doll pattern (完整清晰版 by 那丫头真拽). Symbols defined on page 3: x=sc, v=inc, a=dec, ch=chain, sl=sl st, f=dc, BLO=back loop, FLO=front loop; g appears in the arm row as a special st (thumb bump). Colors: skin, white, light coffee, dark blue, red, pale yellow, light brown.
Mini Mario Doll — Hat Body & Brim (Page 9b)

Hat (continued)
Rnd 8: *6 sc, inc* ×6 (48)
Rnd 9: *7 sc, inc* ×6 (54)
Rnd 10: *8 sc, inc* ×6 (60)
Rnd 11: *9 sc, inc* ×6 (66)
Rnds 12-16: Sc around (66)
Rnd 17: *9 sc, dec* ×6 (60)
Rnd 18: *8 sc, dec* ×6 (54)
Rnd 19: Dec, 50 sc, dec (52)

Hat brim (worked flat at the front)
Row 1: FLO 14 sc, ch 1, turn
Row 2: 14 sc, ch 1, turn
Brim finishes on the last page.
Notes
Page 9 of 9 of the Mini Mario doll pattern (完整清晰版 by 那丫头真拽). Symbols defined on page 3: x=sc, v=inc, a=dec, ch=chain, sl=sl st, f=dc, BLO=back loop, FLO=front loop; g appears in the arm row as a special st (thumb bump). Colors: skin, white, light coffee, dark blue, red, pale yellow, light brown.
Mini Mario Doll — Hat Brim Finish (Final Page)

Hat brim (continued)
Row 3: 14 sc
Work one round of sc around the brim edge to neaten it.
Embroider the letter "M" on the front of the hat in white on a white circle patch, then sew the hat onto the hair cap.
Assembly order: head + ears + nose + mustache, hair cap with sideburns, body with overalls bib, straps and buttons, arms, and finally the hat with its M badge.
Notes
Page 9 of 9 of the Mini Mario doll pattern (完整清晰版 by 那丫头真拽). Symbols defined on page 3: x=sc, v=inc, a=dec, ch=chain, sl=sl st, f=dc, BLO=back loop, FLO=front loop; g appears in the arm row as a special st (thumb bump). Colors: skin, white, light coffee, dark blue, red, pale yellow, light brown.
Frequently asked questions
In what order should I assemble Mario?
Head with ears, nose and mustache first; then hair cap with sideburns; body from the shoes up with the overalls bib, straps and buttons; arms with glove cuffs; and finally the hat with its embroidered M.
How do the color layers of the legs work?
BLO rounds mark each transition — shoe to trouser (round 4) and trouser to red shirt (round 15) — leaving front loops free for the pants edge and the bib to be worked into.
What is the 'g' stitch in the arm round?
A small thumb bump worked in one stitch (bobble-style); the left and right arms place it at mirrored positions.
More crochet patterns

Kyogre Amigurumi

Flower Sprout Amigurumi

Pikmin Amigurumi
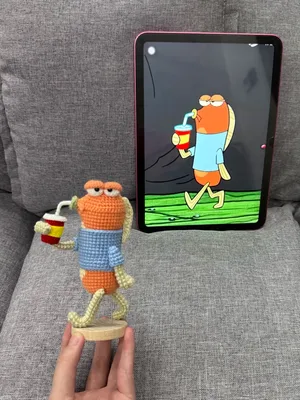
Pouty Happy Fish (Walking Fish Meme)
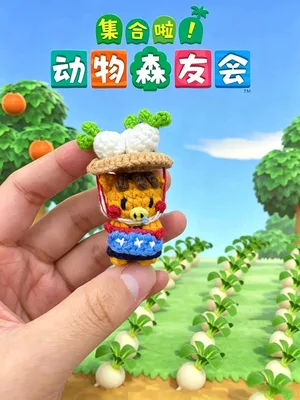
Saharah (Animal Crossing) Charm